A kitchen cabinet lives a harder life than almost any other furniture in the house. It gets slammed, splashed, steamed, and heated from the inside by an oven that pushes panel edges past 60°C. So when a cabinet door edge starts peeling or a side panel splits along the bond line, the failure is rarely random. It is a cabinet glue choice that was never matched to the wettest, hottest room in the home.
This guide breaks down how kitchen and bathroom cabinets actually fail, which water-resistance grade each zone needs, and the five fixes that stop delamination from coming back. We write it from our own production experience supplying cabinet and wardrobe factories. For the purchasing side, our wholesale woodworking adhesives sourcing guide covers supplier audits and bulk pricing.
Table of Contents
- 1. Why Kitchens and Bathrooms Kill Cabinet Joints
- 2. How Cabinet Joints Actually Fail
- 3. Match the Glue to the Water-Resistance Class
- 4. Fix 1: Pick the Right Chemistry for Each Joint
- 5. Fix 2: Control Panel Moisture Before Assembly
- 6. Fix 3: Apply, Clamp and Cure to Spec
- 7. Fix 4: Protect the Edges, Where Water Gets In
- 8. Fix 5: Design for Water, Not Against It
- 9. Adhesive Selection by Cabinet Zone
- 10. Sourcing Cabinet Adhesive at Production Volume
1. Why Kitchens and Bathrooms Kill Cabinet Joints
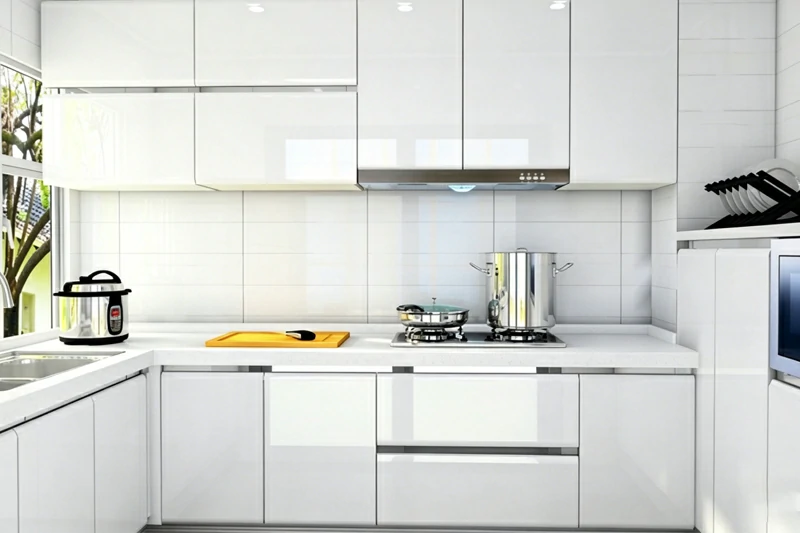
Three forces attack a cabinet bond line at the same time. Steam from a boiling pot pushes humidity around the carcass for an hour at a time. Water finds every unsealed cutout, especially around sinks and dishwasher openings. And heat from ovens or under-counter appliances can drive edge temperatures to 70–80°C, right where standard PVAc glue starts to soften.
None of these forces break a good bond on its own. What kills cabinets is the cycle: the panel swells as it absorbs moisture, shrinks as it dries, and repeats that movement thousands of times a year. A rigid, water-sensitive glue line cracks under the cycling, and each crack lets in a little more water. Delamination is the end of a long process, not a sudden event.
2. How Cabinet Joints Actually Fail
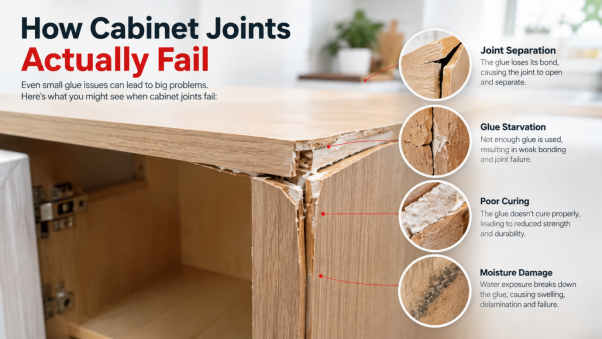
Walk through a warranty claim and you will usually find one of four failure paths:
- Edge banding lift: the band peels back from the panel edge, starting near a sink or oven. Water wicked in through the joint and the glue reactivated.
- Carcass corner separation: the glued dowel or mitre joint opens up as the two panels move in different moisture conditions.
- Face delamination: a laminated or veneered panel splits between the core and the decorative layer after repeated wet-dry cycling.
- Hardware pull-out: hinge and handle screws strip out because the swollen, then crumbled, bond line around them has lost density.
Here is the practical point: three of these four paths start with moisture reaching a bond line that was never specified for wet service. Fix the specification and you remove most of the warranty risk before the first panel is cut.
3. Match the Glue to the Water-Resistance Class
Water-resistance for wood adhesives is graded under EN 204/205. D2 handles interior dry service only. D3 resists humidity and short water exposure, which covers most interior cabinet work. D4 survives sustained wet exposure and exterior service.
For kitchen and bathroom cabinets, the rule we give factories is simple: D3 is the floor, not the ceiling. Use D3 for carcass panels away from water, and step up to D4-grade or a cross-linked system wherever water can pool or splash. If you are weighing the two grades in detail, our D3 vs D4 comparison maps each grade to specific cabinet zones, and our D3 water-resistant glue is formulated for humid interior service.
4. Fix 1: Pick the Right Chemistry for Each Joint
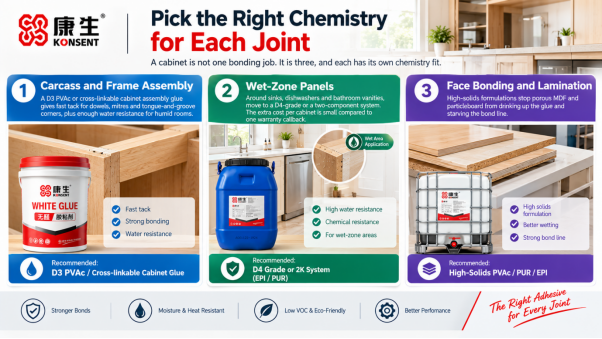
A cabinet is not one bonding job. It is three, and each has its own chemistry fit:
- Carcass and frame assembly: a D3 PVAc or cross-linkable cabinet assembly glue gives fast tack for dowels, mitres and tongue-and-groove corners, plus enough water resistance for humid rooms.
- Wet-zone panels: around sinks, dishwashers and bathroom vanities, move to a D4-grade or a two-component system. The extra cost per cabinet is small compared to one warranty callback.
- Face bonding and lamination: high-solids formulations stop porous MDF and particleboard from drinking up the glue and starving the bond line.
One more chemistry note: if your program also covers children’s rooms, emission class becomes part of the joint specification. We cover that separately in our guide to low-formaldehyde adhesives for children’s furniture.
5. Fix 2: Control Panel Moisture Before Assembly
Glue cannot hold two panels that want to move in different directions. Keep board moisture at 8–10% and let all panels acclimatize in the assembly hall for 24–48 hours before gluing, so a panel stored in a damp warehouse stops fighting a panel stored next to the dryer. In humid coastal factories we have seen corner failures drop sharply just from moving board storage away from loading docks.
6. Fix 3: Apply, Clamp and Cure to Spec
Most delamination complaints we investigate trace back to application discipline, not chemistry. Three numbers to hold:
- Spread: 180–220 g/m² on dowels, grooves and mitres. Starved joints fail clean; drowned joints squeeze out and leave nothing inside the groove.
- Clamp pressure: 0.7–1.0 MPa for panel joints, enough to close the line without pressing all the glue back out.
- Cure time: 24 hours at room temperature before the cabinet moves to edge banding, hardware drilling or packing. Machining warm panels is the classic start of edge lift.
Cold shops need extra attention. Below about 15°C, water-based glues cure slowly and film formation suffers. If your factory runs cool in winter, either extend clamp time or ask your supplier for a low-temperature grade.
7. Fix 4: Protect the Edges, Where Water Gets In
Panels drink water through their cut edges far faster than through their faces, so edge quality decides how long a wet-zone cabinet survives. Use a glue system that stays stable near the 70–80°C an oven can produce, machine edges clean before banding, and make sure the banding line lays down a full, void-free glue film. A hairline gap at the top of a sink cutout will pump water into the core every single day it goes unsealed.
8. Fix 5: Design for Water, Not Against It
Some water will always get in, so good cabinet programs plan for it. Seal sink and dishwasher cutouts during production, keep exposed glue lines out of standing-water zones, and prefer joinery (grooves, tongues, dovetails) over butt joints wherever water can sit. Joinery hides and protects the bond line the way nothing else can.
9. Adhesive Selection by Cabinet Zone
Use this table as the starting spec for a cabinet program, then confirm against the adhesive TDS:
| Zone | Moisture / Heat Risk | Minimum Grade |
|---|---|---|
| Wardrobe and bedroom carcasses | Low | D2–D3 PVAc |
| Kitchen wall cabinets | Steam, moderate heat | D3 water-resistant |
| Base cabinets, general | Spills, cleaning water | D3, sealed edges |
| Sink and dishwasher zones | Standing water, 70–80°C edges | D4 or cross-linked 2K |
| Bathroom vanities | Constant humidity swings | D4 or cross-linked 2K |
| Outdoor kitchens | Rain, full exposure | D4 exterior system |
10. Sourcing Cabinet Adhesive at Production Volume
Once the specification is right, the next risk is batch consistency. A cabinet line running hundreds of carcasses a day cannot absorb viscosity drift between drums. When you evaluate suppliers, ask for batch test certificates, confirm the grade is certified to the EN class on the label, and trial the glue on your own boards before committing volumes. Our range of woodworking furniture adhesives covers D3, D4 and cross-linked systems for exactly this kind of program.
Fighting cabinet delamination right now? Send us the failing joint photos, the board type and where the cabinet is installed, and our engineers will identify the failure path and recommend the right grade. Free samples are available for line trials. Contact KONSENT and stop paying for rework.